MarginNote ⨉ AppleScript: An Invite to Test out AppleScript on MarginNote
Hi everyone!
We are really excited to bring support for AppleScript to MarginNote 3. The features are almost complete, but before rolling them out, we would love to have them tested. If you are interested, download the beta version below.
https://drive.google.com/file/d/1fyQO3HdZcySH-cagWR05kyqV5empHAXm/view?usp=sharing
Note that you will have to have a license for the website version of MarginNote to test it out. If you purchased MarginNote from the Mac AppStore, we are sorry that we are unable to offer you a chance to have a look at it early. (No worries though as this version will be rolling out soon.)
If you’ve encountered any problems or have any specific needs while testing out AppleScript, PLEASE SHARE THEM IN THIS THREAD as we would love to improve this.
To get you started with using AppleScript with MarginNote, we have prepared a brief guide. Although this guide serve no intention to teach you the needy-greedy details of AppleScript, you can probably get a brief idea of how to automate MarginNote 3 using AppleScript.
What is AppleScript, and why?
Briefly speaking, it is a scripting language on the MacOS platform that allows for the automation of the system itself and supported apps. While official support for AppleScript ended in 2014 or so, it is still the most popular scripting language on the MacOS platform and still enjoys a wide range of support, especially in pro applications. By supporting AppleScript, we hope that our pro-users on the Mac could optimize their workflows and accomplish things that they previously weren’t able to.
MarginNote ⨉ AppleScript
If you are not a programmer, learning a scripting language may sound very intimdating to you. However, you do not need to feel worried as AppleScript is very easy to work with as it is very close to natural language.
Preparations
To use AppleScript with MarginNote 3, you will have to have the beta version of MarginNote 3 installed. You will also need to have Script Editor which should already be installed on your make. If you need better code-highlighting, you can use Visual Studio code and the AppleScript plugin.
Launching MarginNote
Open up Script Editor, type in the following line of code:
tell application "MarginNote 3" to activate
Once finished, click “run” (Or press Cmd + R on your keyboard). Notice that this single line of code will open MarginNote. It doesn’t sound too bad to understand, does it?
Checking the Dictionary
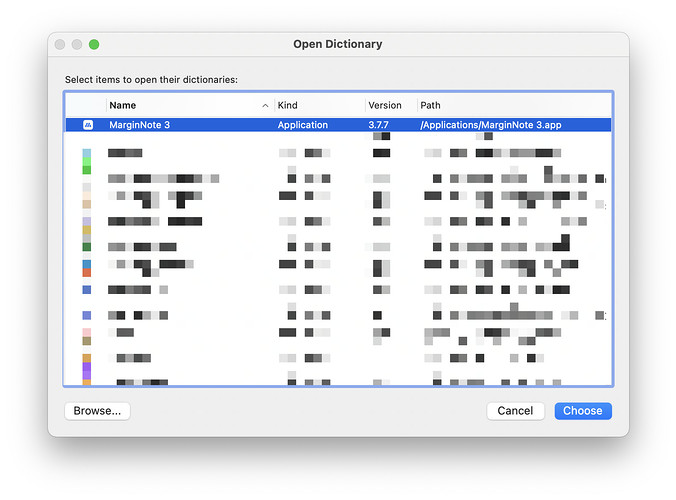
In order to use some of the specific AppleScript commands with MarginNote, we will have to open the dictionary for MarginNote 3. While having Script Editor open in the foreground, select “File” → “Open Dictionary” from the top menu (or press Shift + Cmd + O on your keyboard), and you will be prompted to select the dictionary for an app. Select MarginNote 3.
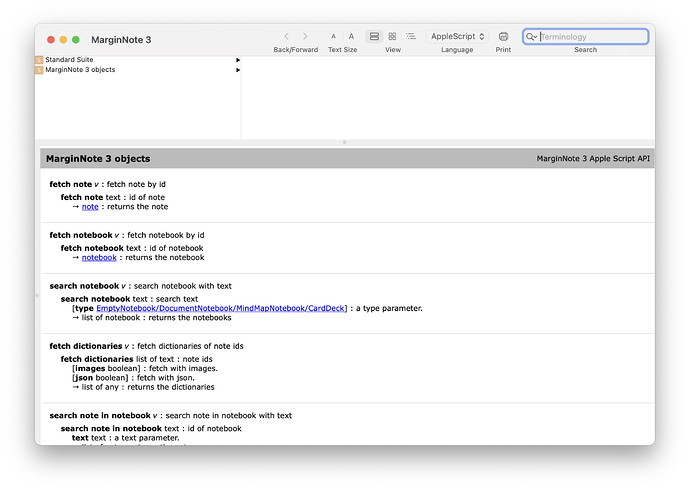
Then, you will have the dictionary open.
The dictionary serves as the reference for writing AppleScript for MarginNote 3. Here, we will not go into the details as to how you can use the dictionary, but instead we will give a few samples and explain how the sample works. You can compare the the sample code with the dictionary to have a better understanding of how to use it.
Searching For A Notebook
Now, with the dictionary open, let’s have a look at how to search for a specific notebook.
tell application "MarginNote 3"
	return search notebook "Sample"
end tell
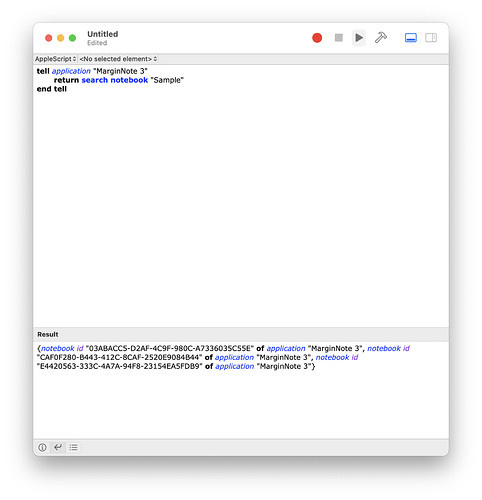
After typing the code into Script Editor, run it, and your should be getting something similar to the picture below.
Note that down in the output section, I have:
{notebook id "03ABACC5-D2AF-4C9F-980C-A7336035C55E" of application "MarginNote 3", notebook id "CAF0F280-B443-412C-8CAF-2520E9084B44" of application "MarginNote 3", notebook id "E4420563-333C-4A7A-94F8-23154EA5FDB9" of application "MarginNote 3"}
This segment of code essentially tells MarginNote 3 to search for all the notebooks that has “Sample” in its name and return them. If you didn’t get anything or gets an error, no worries. It essentially means that no notebook in your collection has the word “Sample” in its name. Simple change the word “Sample” to the name of a notebook in your collection.
If we would dive a little deeper into the code, you realize that it has two layers:
tell application "MarginNote 3"

end tell
This outer layer serves as an enclosure for all the actions that needs to be done using the APIs provided by MarginNote 3, and inside it lies the code that deals with MarginNote’s AppleScript API.
Now that we can get the notebooks whose name contains “Sample”, but how can we get a single notebook? Well, to do this, we can use the following code.
tell application "MarginNote 3"
	return item 1 of (search notebook "Sample")
end tell
What this line of code does is that it returns the first item of the result of search notebook "Sample". Simple enough?
Okay, you may be asking, how do we get all the notebooks? To do this, you simply change the word Sample to an empty text, like the code shown below.
tell application "MarginNote 3"
	return search notebook ""
end tell
Note that you could also limit your search to document notebooks, mind-map notebooks, and card decks.
tell application "MarginNote 3"
	return search notebook "" type DocumentNotebook
end tell
tell application "MarginNote 3"
	return search notebook "" type MindMapNotebook
end tell
tell application "MarginNote 3"
	return search notebook "" type CardDeck
end tell
Getting Notes of a Notebook
Now that we have the notebooks, we could get the notes of a notebook through the code below:
tell application "MarginNote 3"
	set nbk to item 1 of (search notebook "Sample")
	# you should be familiar with the code above:-)
	set nLst to note ids of nbk
	# It gets the ids of all the notes in the notebook that we get from the code above
	set nLst to fetch dictionaries nLst
	# The code above returns a dictionary for each of the ids provided
	set titleLst to {}
	# The code above creates an empty list for all the note titles.
	# We now then iterate through nLst, the list of notes, with the repeat statement
	repeat with n in nLst
		# We do not want add the title of a note to the list if the note does not have a title, so we will need to use an if statement to tell if a note has a title or not. If it has, we would want to add it to the titleLst.
		if title of n is not "" then
			# Add the title of n to the end of our titleLst.
			set end of titleLst to title of n
		end if
	end repeat
	# return the titleLst
	return titleLst
end tell
Note that in AppleScript, all comments start with #. As the comments are pretty detailed, we will not explain the code again here.
There is something to be noted though. Look at the following two lines of code:
set nLst to note ids of nbk
set nLst to fetch dictionaries nLst
For this code, we are reading all the ids of the notebook, and then get the dictionary of for each id. You can use the following code to achieve a similar purpose:
set nLst to notes of nbk
However, using this single-line version below would be significantly slower than the two-line version, because in the second one, each time you iterate through the notes, you will have to communicate with MarginNote, which is quite slow. This can make a massive difference when you are dealing with a large number of notes. Don’t quite understand? No worries, just use the version with two lines.
Getting Notes from Main Mind-map and Child Mind-maps
If you want to separate the notes that you get from the main mind-map and the child mind-maps, you can use the code below:
tell application "MarginNote 3"
	# Get the notebook with name "Sample"
	set nbk to item 1 of (search notebook "Sample")
	# Get the child mind-maps of the notebook
	set nLst to child mindmaps of nbk
	# Create a list that would contain the notes of the different mind-maps
	set childmindmapLst to {}
	# Create a list for the notes of the main mind-map
	set titleLst to {}
	# Get the notes in the main (root) mind-map
	set rLst to note ids in root mindmap of nbk
	set rLst to fetch dictionaries rLst

	# Add the title of the notes to titleLst
	repeat with m in rLst
		if title of m ≠ missing value then
			set the end of titleLst to title of m
		end if
	end repeat

	# add titleLst to the end of the childmindmapLst
	set the end of childmindmapLst to titleLst

	# for each child mind-map, add the title list of the child mind-map to the end of the childmindmap list
	repeat with childmindmap in nLst
		set titleLst to {}
		set bLst to note ids in branch of childmindmap
		set bLst to fetch dictionaries bLst
		repeat with m in bLst
			if title of m ≠ missing value then
				set the end of titleLst to title of m
			end if
		end repeat
		set the end of childmindmapLst to titleLst
	end repeat
	# return the child mind-map list
	return childmindmapLst
end tell
Getting Json Of the Notes
It is actually quite a hassle sometimes trying to get the different attributes of a note. Therefore, we’ve provided a json API that allows you to get the json for each single note. To do this, change the code fetch dictionaries (listname) to fetch dictionaries (listname) with json. Afterwards, the code should something like this:
tell application "MarginNote 3"
	set nbk to item 1 of (search notebook "Sample")
	set nLst to note ids of nbk
	set nLst to fetch dictionaries nLst with json # Look at here!
	set jsonLst to {}
	repeat with n in nLst
		if title of n is not "" then
			# We need to get the json of a note and add it to our json list using the code below
			set end of jsonLst to json of n
		end if
	end repeat
	return jsonLst
end tell
The support for json opens up a wide variety of opportunities. You can now use MarginNote with your python, JavaScript, and many other languages.
Manipulating the Notes
Besides reading and fetching notes, it is also quite easy to manipulate the notes. Here is an example:
tell application "MarginNote 3"
	set nbkid to id of item 1 of (search notebook "MarginNote 3 User Guide") # gets the notebook id of the MarginNote 3 User Guide notebook
	set p to item 1 of (search note in notebook nbkid text "Powerful Excerpt") # search for the first note with text Powerful Excerpt in the notebook
	set nn to new note in notebook nbkid # create a new note
	add child notes {nn} target note p # add nn as a child note to the note p from the search result
	set title of nn to "NewNote" # change the title of nn to "NewNote"
	set n2 to fetch note "1806EAE8-7581-4B91-B3D7-E0E188DD0BF9" # Fetch the note with the id specified.
	drag notes {n2} target note p method Clone # clone note n2 to the note p
	append text comment "test comment" target note nn # add text comment to nn
end tell
Bugs and Requests
If you’ve encountered any bugs or have any requests for us to have a look regarding the AppleScript, feel free to create a post in this thread.
Thanks so much for testing this out, and the MarginNote team sincerely wish that we could grow together into a brighter future.
